Globus
Globus is a service for fast, reliable, secure data movement. Designed specifically for researchers, Globus has an easy-to-use interface with background monitoring features that automate the management of file transfers between any two resources, whether they are at the Digital Reseach Alliance of Canada (formerly Compute Canada), another supercomputing facility, a campus cluster, lab server, desktop or laptop.
Copying files between Alliance (formerly Compute Canada) sites using the Globus web interface
The procedure of using the Globus web interface for transferring data between different Alliance (formerly Compute Canada) sites ("endpoints" in Globus), including those at SciNet, is well described in the Alliance (formerly Compute Canada) Globus documentation.
At SciNet, there are three endpoints:
computecandada#niagara
This endpoint gives access to the files on your Niagara $HOME.
To get easy access to your files on your $SCRATCH in the Globus web interface, it can be helpful to add a so-called softlink in your home directory to the scratch directory, by issuing the following command on the command line on Niagara (once):
$ ln -sn $SCRATCH $HOME/scratch
A similar soft-link can be useful for your $PROJECT directory, if you have one on Niagara.
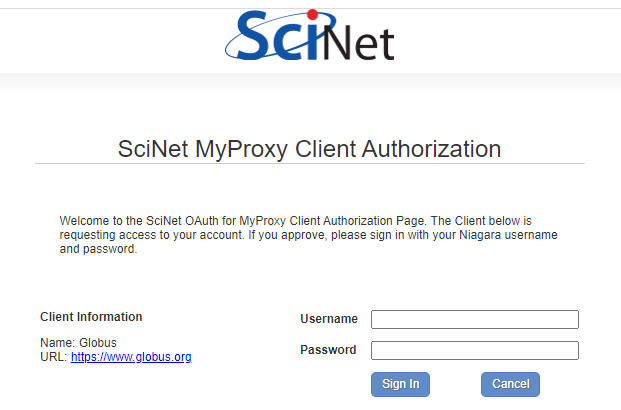
Note: Starting on Jan/22/2021 we are transitioning to oauth for authentication, and you'll need a secondary login to access the niagara endpoint.
computecanada#hpss
This endpoint gives access to your HPSS space, if you have access to it. HPSS is a tape-backed hierarchical storage system that provides a significant portion of the allocated storage space at SciNet. The Globus endpoint is not the only way to interact with HPSS, and may not be appropriate method for your use case. Users should read the HPSS page before using this endpoint.
The hpss endpoint has also been switched to oauth, so you will be prompted with the same secondary login pane as above for the first login.
Copying files between Alliance (formerly Compute Canada) sites and your personal computer using the Globus web interface
The procedure of using the Globus web interface for transferring data between Alliance (formerly Compute Canada) sites (including those at SciNet) and your own personal computer, is well described in the Alliance (formerly Compute Canada) Globus documentation.
Essentially, you create an "endpoint for your personal computer", then you can use the web interface to transfer to one of the SciNet endpoints listed above.
Copying Files to Niagara From the Linux Command-line
Step 1: Install globus CLI
Requires python 2.7. On the machine you're transferring from:
$ virtualenv venv-globus
$ source ./venv-globus/bin/activate
$ pip install globus-cli
Step 2: Login to globus
$ globus login
You should see:
Please log into Globus here:
---------------------------
https://auth.globus.org/v2/oauth2/...
---------------------------

Enter the resulting Authorization Code here:
Visit the URL in a web browser, choose "Digitial Research Alliance Canada" as your organization, and enter your Niagara username/password.
Step 3: Create a personal endpoint
$ globus endpoint create --personal my-endpoint-name
Replace my-endpoint-name with a name of your choice.
You should see:
Message:     Endpoint created successfully
Endpoint ID: xxxxxxxx-xxxx-xxxx-xxxx-xxxxxxxxxxxx
Setup Key:   yyyyyyyy-yyyy-yyyy-yyyy-yyyyyyyyyyyy
Save this info as we'll need it later.
Step 4: Get Globus Connect Personal
$ wget https://downloads.globus.org/globus-connect-personal/linux/stable/globusconnectpersonal-latest.tgz
$ tar -xzf globusconnectpersonal-latest.tgz
$ cd globusconnectpersonal-x.y.z
Step 5: Setup your endpoint
$ ./globusconnectpersonal -setup yyyyyyyy-yyyy-yyyy-yyyy-yyyyyyyyyyyy
replacing "yyyy..." with the Setup Key from 'globus endpoint create'. You should see something like:
Configuration directory: /home/username/.globusonline/lta
Contacting relay.globusonline.org:2223
Done!
Step 6: Configure your endpoint (optional)
By default globus only allows transfers to/from your home directory.
Edit ~/.globusonline/lta/config-paths and add a line for any other directories you need, e.g.:
/path/to/data/,0,1
Step 7: Start Globus Connect
$ ./globusconnectpersonal -start &
Step 8: Set some convenience variables
$ my_endpoint="xxxxxxxx-xxxx-xxxx-xxxx-xxxxxxxxxxxx"
$ niagara_endpoint="77506016-4a51-11e8-8f88-0a6d4e044368"
replacing "xxxx..." with the Endpoint ID from 'globus endpoint create'.
Step 9: Activate the Niagara endpoint
$ globus endpoint activate --myproxy --myproxy-lifetime=1000 $niagara_endpoint
Step 10: Start a transfer
$ globus transfer --recursive $my_endpoint:/path/to/data $niagara_endpoint:/scratch/g/group/username/data
