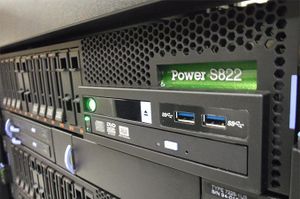
P8
| P8 | |
|---|---|
| Installed | June 2016 |
| Operating System | Linux RHEL 7.2 le / Ubuntu 16.04 le |
| Number of Nodes | 2x Power8 with 2x NVIDIA K80, 2x Power 8 with 4x NVIDIA P100 |
| Interconnect | Infiniband EDR |
| Ram/Node | 512 GB |
| Cores/Node | 2 x 8core (16 physical, 128 SMT) |
| Login/Devel Node | p8t0[1-2] / p8t0[3-4] |
| Vendor Compilers | xlc/xlf, nvcc |
Specifications
The P8 Test System consists of of 4 IBM Power 822LC Servers each with 2x8core 3.25GHz Power8 CPUs and 512GB Ram. Similar to Power 7, the Power 8 utilizes Simultaneous MultiThreading (SMT), but extends the design to 8 threads per core allowing the 16 physical cores to support up to 128 threads. 2 nodes have two NVIDIA Tesla K80 GPUs with CUDA Capability 3.7 (Kepler), consisting of 2xGK210 GPUs each with 12 GB of RAM connected using PCI-E, and 2 others have 4x NVIDIA Tesla P100 GPUs each wit h 16GB of RAM with CUDA Capability 6.0 (Pascal) connected using NVlink.
Compile/Devel/Test
Access through the Niagara login nodes niagara.scinet.utoronto.ca using your CC/SciNet account and from there you can ssh to p8t01 or p8t02 for the K80 GPUs and to p8t03 or p8t04 for the Pascal GPUs.
Softwares
GNU Compilers
- The default system GCC is 5.4.0
To load the newer advance toolchain version use:
For p8t0[3-4]
module load gcc/7.3.1
IBM Compilers
To load the native IBM xlc/xlc++ compilers
For p8t0[1-2]
module load xlc/13.1.4
module load xlf/13.1.4
For p8t0[3-4]
module load xlc/16.1.0
module load xlf/16.1.0
CUDA
The current installed CUDA Tookit is 9.2.
module load cuda/9.2
OpenMPI
Currently OpenMPI has been setup on the four nodes connected over QDR Infiniband.
For p8t0[1-2]
$ module load openmpi/1.10.3-gcc-5.3.1
$ module load openmpi/1.10.3-XL-13_15.1.4
For p8t0[3-4]
$ module load openmpi/1.10.3-gcc-6.2.1
$ module load openmpi/1.10.3-XL-13_15.1.5
PE
IBM's Parallel Environment (PE), is available for use with XL compilers using the following
$ module pe/xl.perf
mpiexec -n 4 ./a.out
documentation is here
cuDNN
The NVIDIA CUDA Deep Neural Network library (cuDNN) is a GPU-accelerated library of primitives for deep neural networks. cuDNN accelerates widely used deep learning frameworks, including Caffe2, MATLAB, Microsoft Cognitive Toolkit, TensorFlow, Theano, and PyTorch. If a specific version of cuDNN is needed, user can download from https://developer.nvidia.com/cudnn and choose "cuDNN [VERSION] Library for Linux (Power8/Power9)".
cuDNN is installed as modules:
cudnn/cuda9.2/7.2.1
NCCL
The NVIDIA Collective Communications Library (NCCL) implements multi-GPU and multi-node collective communication primitives that are performance optimized for NVIDIA GPUs. NCCL is provided as modules on the system:
module load cuda/9.2 nccl/2.2.13
Anaconda (Python)
Anaconda is a popular distribution of the Python programming language. It contains several common Python libraries such as SciPy and NumPy as pre-built packages, which eases installation. Anaconda is provided as modules: anaconda2 and anaconda3
To install Anaconda locally, user need to load the module and create a conda environment: (anaconda3 as example)
module load anaconda3
conda create -n myPythonEnv python=3.6
To activate the conda environment: (should be activated before running python)
source activate myPythonEnv
Once the environment is activated, user can update or install packages via conda or pip
conda install -n myPythonEnv <package_name>
pip install <package_name>
To deactivate:
source deactivate
To remove a conda enviroment:
conda remove --name myPythonEnv --all
To verify that the environment was removed, run:
conda info --envs
TensorFlow
TensorFlow is provided as prebuilt Python Wheels that users can use pip to install under user space. Python wheels are stored in /scinet/p8_ubuntu16.04/Applications/TensorFlow_wheels/conda. It is required to install custom TensorFlow wheels into a Conda virtual environment.
Installing with Anaconda2 (Python2.7):
- Load modules:
module load cuda/9.2 cudnn/cuda9.2/7.2.1 nccl/2.2.13 anaconda2
- Create a conda environment tensorflow-1.11.0-py2:
conda create -n tensorflow-1.11.0-py2 python=2.7
- Activate conda environment:
source activate tensorflow-1.11.0-py2
- Install TensorFlow into the conda environment with updated dependencies:
conda install -n tensorflow-1.11.0-py2 keras-applications keras-preprocessing scipy mock cython numpy=1.14.5 protobuf grpcio markdown html5lib werkzeug absl-py bleach six openblas h5py astor gast termcolor setuptools=39.1.0 backports.weakref
pip install /scinet/p8_ubuntu16.04/Applications/TensorFlow_wheels/conda/tensorflow-1.11.0-cp27-cp27mu-linux_ppc64le.whl
Installing with Anaconda3 (Python3.6):
- Load modules:
module load cuda/9.2 cudnn/cuda9.2/7.2.1 nccl/2.2.13 anaconda3
- Create a conda environment tensorflow-1.11.0-py3:
conda create -n tensorflow-1.11.0-py3 python=3.6
- Activate conda environment:
source activate tensorflow-1.11.0-py3
- Install TensorFlow into the conda environment with updated dependencies:
conda install -n tensorflow-1.11.0-py3 keras-applications keras-preprocessing scipy mock cython numpy=1.14.5 protobuf grpcio markdown html5lib werkzeug absl-py bleach six openblas h5py astor gast termcolor setuptools=39.1.0
pip install /scinet/p8_ubuntu16.04/Applications/TensorFlow_wheels/conda/tensorflow-1.11.0-cp36-cp36m-linux_ppc64le.whl
